My Etsy Shop

Thursday, September 6, 2012

Sock Monkey Hat Contest

Enter to win a custom made Sock Monkey Hat by naming the YouTube personalities pictured below. Leave your comment and name all four. (Close friends and family cannot participate because you know who they are!) Please use their YouTube names. One of them pictured has only appeared in one video so if you can name him I know you are a fan! If you cannot name them all, just do your best. All comments will count towards winning.

You can have an extra chance to win by posting this blog post on your Facebook page and coming back here to comment and tell me you posted.

Also - get another chance to win by Liking my Facebook page and making another comment here that you Liked my page or if you have already LIKED my Facebook page tell me that in a comment.

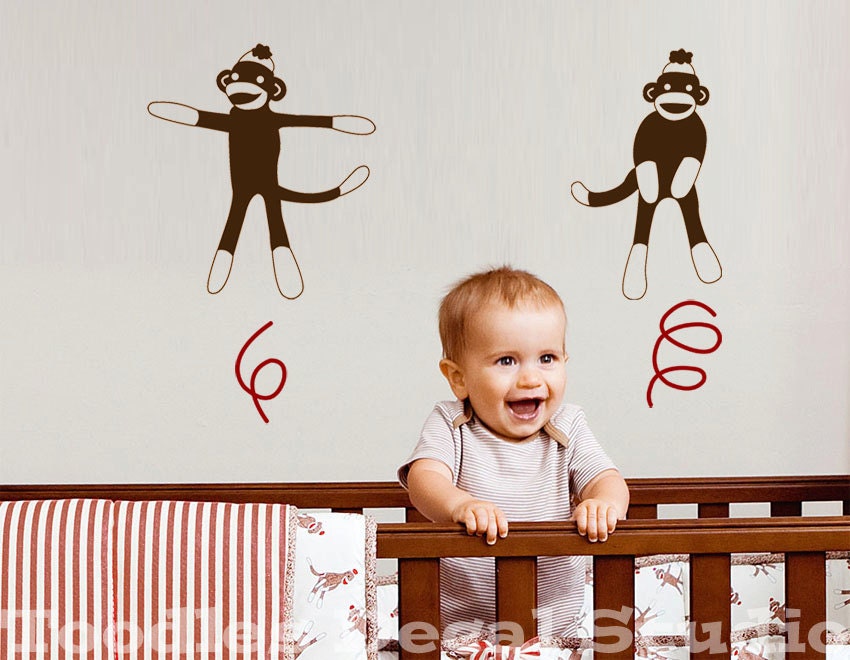
Last but not least, post a link in the comments to one of your favorite videos that at least one of these handsome guys appears in.

That is FOUR chances to win. The Winner will be randomly chosen and announced on October 1, 2012. Once chosen the winner can contact me and tell me what size Sock Monkey Hat they want! Good Luck and spread the word!


Wednesday, September 5, 2012

Newborn Crochet Tattoo Art Mom Hat - How-To

A friend of mine asked me to make a hat for a newborn baby with tattoo art and Mom embroidered on. I made the beanie in black with a red heart and a banner sewn across in white with MOM embroidered on it. To learn how to make a beanie you can watch my YouTube video. I made the heart by following the pattern on this YouTube video by Hectanooga. She has lots of instructional videos for crochet. The banner was made with 16 foundation double crochets and then I embroidered MOM on it. But you could put anything on it - even DAD! Comment below if you make one or send me a picture of how yours turned out! If you want me to make one send me a message (convo) through my etsy shop at www.etsy.com/shop/alanemarie.

Thursday, August 30, 2012

Sock Monkey Hats - Video Debut!


Recently famous YouTube sensation Mr. Arturo Trejo uploaded a video that featured my Sock Monkey Hats! See them in action.

I was so excited to see the video and the nice endorsement sending people to my Etsy page that I cried! Arturo Trejo and his son Jose Luis look adorable in the hats, too. Well Jose looks adorable. Arturo looks great! Order yours today! Check out the video and comment below to let me know what you think!

Monday, August 20, 2012

I am excited to share this Treasury from Etsy.com because I am in it!

'Sock Monkey Love!!' by taterrounds


$88.00

$32.00

$11.95

$25.00

$9.60

$30.00

$36.00

$20.00

$10.00

$72.00

$20.00

$9.95

$150.00

$4.95

$16.50

Treasury tool supported by the dog house

Wednesday, August 8, 2012

Pea Pod Crochet Cocoon & Hat - Photo Prop

I was recently asked to crochet a pea pod cocoon and hat for a young lady who will be having her baby soon. It was so much fun to figure out just how I was going to make it. I decided to use some soft green yarn and made little twirly tails on the bottom of the cocoon and the top of the hat to look like a real pea pod. I attached 3 pom poms to represent peas. They are simply tied on so they can be removed and the cocoon looks sweet either way. I cannot wait to see pictures of the baby in this project. I scribbled out the pattern as I made it. One of these days I will get things together and start writing out the patterns so other people can read them!


Friday, July 20, 2012

Pretty Ponchos

I made more of my asymetric ponchos for the fashion team at work. It gets cold in the office sometimes so they like to have something pretty to wrap up in. I started making these ponchos after a customer at a craft fair I was selling in asked me if I made ponchos. I thought, "Ponchos - do people still wear those?" Then she emailed me a picture of one she saw Jennifer Lopez wearing in the movie "Monster In Law" and I was hooked. I started searching the internet for other images of ponchos and found out they are popular again. The next craft fair I had made several and sold some and that's how I came to make so many for the fashion team at work. They saw them and voila - I was mass producing ponchos. That first round I made 16 of them and a scarf for one of the guys.

This last batch I made was 5 or 6 (I forget!) and another scarf. It was fun to make them in the different colors they picked. They had me make one in pink, blue and red as well as some black. One of these days I will write out that pattern and share it here. If you want me to make you one I am now selling them on Etsy. Just click on the link and you can have one too!

Some of the gals took pictures and said they wouldn't mind if I share them. I also made a scarf for one of the guys on the team - he is pictured as well. Fun to wear—they can be worn with jeans or dressed up!

Please comment below and let me know what you think of these ponchos. I really want to know!


This picture is from the first batch I made. There were 16 total (only 13 pictured here)!

Thursday, July 12, 2012

Crocheted Rag Rug

I had a old sheet that didn't have a fitted sheet to match anymore because the elastic gave out and I didn't know what to do with it. After scouting around for some great idea I found some YouTube videos explaining how to tear the sheet to make "yarn" for use in projects like crocheted market bags or rag rugs. A couple of weeks ago I tore the sheet and wound it into a pretty good sized ball. It was fairly easy to do. The hardest part was dealing with the string fibers that were made from the tearing. You have to pull those off and throw them away. They have a tendency to cling to your hands and had a way of finding their way back to stick on my pant legs. But eventually I got the ball wound.

The other night I decided to use my "yarn" and start on an oval rug. I began with a chain of 18 using an "S" hook. It is a super big hook and makes crocheting with the fabric easy! Then I single crocheted in each chain to the end with 3 extra stitches in the end and then down the back side of those stitches to the other end. Three extra stitches in that end finished one round. I didn't have a pattern but kept going around and increased in about every other stitch on the ends to keep the rug from curling. In about an hour I had a 12 inch wide by about 24 inch long oval. I'm not finished yet but I will work on it when I have time until the yarn runs out. If the rug is too small to be practical I may end up finding the fitted sheet with the rotten elastic and make more yarn. I will keep you posted on my progress!

Friday, July 6, 2012

Baby Emily's Quilt

Before my granddaughter Emily was born I made this quilt for her using fabric from Moda's Ruby Fabric line. I love the colors and was happy to finally have a project to make with the charm pack I bought. I added some additional yardage from a store in St. George. (Sorry I don't remember which shop it was. My daughter and I went on a quilt shop shopping spree and visited so many that day!)

It was made in standard rows with a strip between rows 2 and 3 on which I added three flowers and Emily's name. There is also sashing on both sides of the strip and a border all around the outside in the same fabric. Then an additional border in a contrasting fabric all from the Moda line. I forgot to take a picture of the back but it was just a plain pink fabric.

I quilted every other block with a heart and then a flower using my regular sewing machine. The quilting isn't perfect - I'm still learning - but it was quilted with love!

I finished the quilt before my daughter's baby shower except for the binding. In order to "give" it to my daughter at her shower I used my serger and serged all the way around the quilt to finish it temporarily until I had time to bind it.

The other day I finally got around to binding the quilt and will officially give the blanket to Emily  as soon as I see her next!


Sunday, July 1, 2012

Hex Crocheted Handbag

Sometime ago I saw some videos by futuregirl detailing how to crochet hexagons into a tote. I watched the videos, favorited them and bookmarked her site so I could make one in the future. I wanted to know how to crochet a hexagon so this project was a perfect way to make some and put them together into a project that wouldn't take too long to finish.


The other day I was looking at my favorites on YouTube and found the videos and remembered how I wanted to try them so I got my yarn together and began. I decided that my daughter Kayla could use a new purse. I had crocheted her one months ago and she has used it hard and it looks like it. So I picked her favorite Rasta colors and put this bag together. I lined it with pockets and put a magnetic snap in as well. The bag is about 16" x 17". The strap was made by double crocheting a strip as long as I wanted it and sewing it around a piece of cording and then sewing it to the bag. Its different from the strap that futuregirl makes. The last bag I made my daughter we bought a strap but I wanted to see how a crochet strap made this way would hold up.  I will be sending the bag off to her very soon! I hope she loves it!


 Sorry the pictures of the lining are overexposed. Still trying to figure out how to use my Nikon D-60!
See the magnetic snap and the pockets!


The Hex Handbag hanging out in my garden!

Friday, June 15, 2012

Fabric Banner


I got the bright idea (at the last minute - of course) that I should make a banner with my grand daughter's name on it as a decoration for the party after her blessing. Of course, I had limited time so I enlisted my daughter (her momma) to help with the project. She purchased the material and other notions and I came to her house that night to start. 

She had already made the cute yo yo's and the covered buttons that we were using to embellish the banner and cut out the beginnings of the banner flags. I finished cutting them out, rounded the bottom corners and sewed them together, clipping the curves and turning them right side out. My daughter ironed them and then made the "binding" for the strip. 

My daughter did all the letters. On another day I helped sew on the yo yo's and buttons and we were done! Hope you enjoy the pictures. 

Our banner was based on the banner tutorial found here on the Moda Bake Shop. If you have any questions let me know!


Friday, June 8, 2012

Blessing Day Blanket

So far I have 12 grandchildren and number 13 is on the way. I have crocheted a white blanket for each baby's blessing day. The 12th one is by far my favorite so far and the hardest one I have ever made.


It is made up of 64 squares each with a flower in the middle. Once all of the flowers were sewn together I crocheted a border around the outside and it was done.


This blanket also took me the longest to make but was very worth it. Sorry about some of the pictures. It is hard to take good pictures of white objects. I took it outside and hung it over our wall on top of a sheet.

Then I laid the sheet on the grass and laid it on top of that but it was windy. The minute I would get the sheet all straightened out the wind would blow it and I would have to start all over!


Monday, June 4, 2012

Blessing Day Dress

I made this dress for my daughter's baby's blessing day. The material for the bottom (or skirt) of the dress I purchased at Joann very early in her pregnancy because we saw the fabric and fell in love. I am glad I did because they do not have it anymore. Perhaps they will get more in the future, but right now they don't seem to have it online or in the store.
The top of the dress is satin and I found a beautiful trim that I hand sewed around the neckline and all the way around the bottom of the dress.

I made the rosette from the same ribbon that is on the front of the dress by watching this YouTube tutorial. It was the first time I made one - well, I actually made two but this one was the best of the two. The lace on the sleeve actually had elastic already sewn on so it made the sleeve so much easier to finish because I didn't have to sew a casing for the elastic and sew on the lace separately. I love, love, love shortcuts.

The blessing day was a lovely day. See below for a picture of the baby!